Friday, July 29, 2011

Introducing Vinny!

Everyone, I'd like you to meet my new friend Vinny!  Vinny the shop vac was my anniversary present (this anniversary thing seems to be lasting all summer, and it's awesome).  He's adorable, blue, and packs a serious punch.  He wasn't supposed to be here until tomorrow, but magically showed up today, so I spent the whole afternoon sucking up everything in the living room and hallway.  It was the best.  I forgot to take a picture of Colin's awesome anniversary present, but I promise I will tomorrow and it will get it's own fancy post :)

In other news, we (mostly Colin) finished the tile in the entryway!  Yay to being done with tile!  There just isn't anything enjoyable about the tiling process, and just the idea of having to tile bathrooms and the kitchen makes me squirm.  But until then, I'll just enjoy our beautiful new floor and forget about how it got that way :)

Coming soon:  An introduction to our new diesel Truck showing up Monday :)

Thursday, July 28, 2011

The day we've been waiting for (was yesterday)!

Our floors are here, our floors are here!!!  After a ridiculous amount of delivery mishaps and an extra week and a half, our flooring has finally arrived, and it looks great!  We couldn't be happier with both the quality and the color.  Unfortunately, we had to order so much of it that it nearly takes up both of our spare rooms while still in the box.  We decided to take out a few boxes at a time to let it "breathe" since chances are we aren't going to do the whole house at once.
While not moving around about 4600 lbs of floors (including the boxes at the Tellez residence), we've been knee deep in tile work.  The fireplace is now grouted and awaits sealant tomorrow (see the fireplace post for updated pictures), and the entryway is cut and laid!  Tomorrow, we grout.  All in all the entryway went way better than the fireplace.  I'm sure it has a little to do with the fact that we had a better idea about what we were doing, but starting with a completely level surface didn't hurt either.  Luckily for us, Colin is a whiz with the tile saw, and all of the cuts lined up perfectly!  It completely transforms the entryway and will look great with the laminate! 
At this point after going non stop nearly every day with the house, my body is slowly breaking down and covered in bruises.  Renovating a house is truly the best workout there is.  When we're not working our butts off, I like to spend my time hanging out with this guy:
Can't I just play with legos and read books all day?

Monday, July 25, 2011

What I Learned Today

Today, I learned two things:

1.  I strongly dislike tiling.
2.  I love shop vacs.

Needless to say, we tiled the area in front of the fireplace.  Throughout the whole process we broke one tile, realized at least two things we hadn't thought of before hand, and got super dirty.  It wasn't so bad, but tiling is definitely too stressful for me.  I think the thing that bugs me the most is that it's so precision heavy, and yet at some point you just have to give in and realize that not everything is going to be exactly perfect.  How frustrating.  Here's the transition of the fireplace to far.  I'll keep updating this post until we're finished with everything (grout, floors, moulding, etc.).


Loving shop vacs needs no explanation.  They get up dirt you didn't even know you had!

Renovation is more fun with friends!

This weekend our dear friend George drove up for a visit, and we put him straight to work!  I can't express enough what a huge help it was to have some more manpower to get us through the end of the demolition.  After the "hey, hi, how are you" moments had passed, we busted out the mini sledge hammer and got to work on the rest of the tile in the entryway and in front of the fireplace.  This is one of my absolute favorite things, but since the boys were so much more efficient, I decided to finish scraping the back room instead.
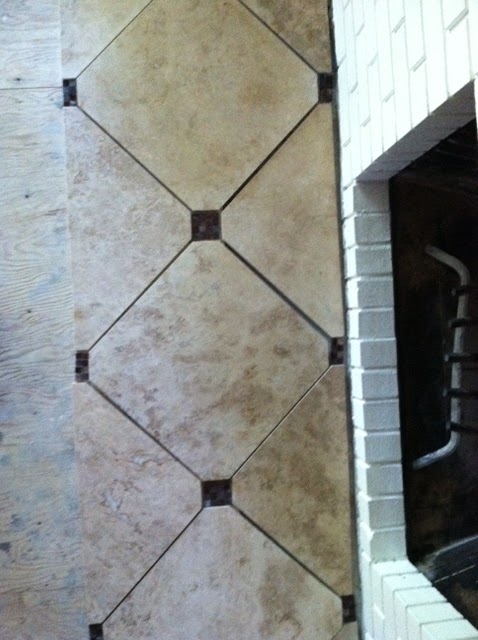
The finished fireplace demo.
The boys working on the entryway
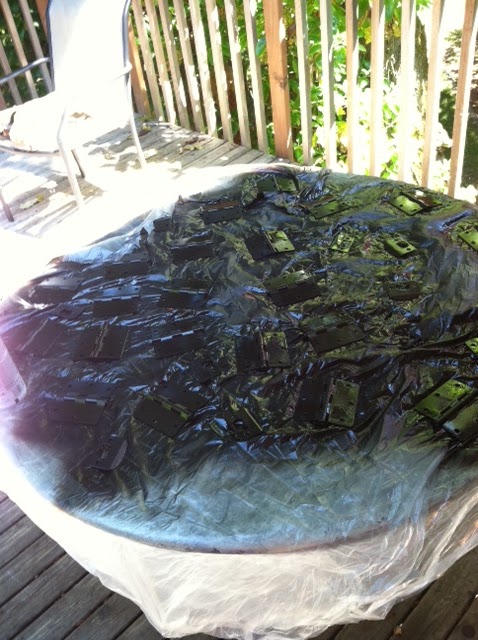
Since we're replacing 13 doors in the house, and hardware can get expensive, we decided to try and spray paint what we already had to match our bronze fixtures.  I only took a picture after I applied the final coat, so I'll be updating this section later today after I finish with the sealant.  It worked great and saved us a ton of money!
The last thing we did for the day was finishing priming all of the door frames (we're also saving those since they're in pretty good shape and it'll save lots of $$).
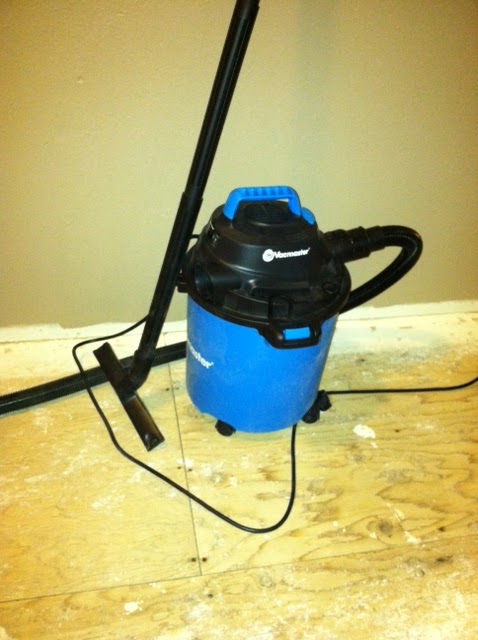
George working hard!
Since the boys worked really hard all day, we headed to the Bremerton Brewfest for the rest of the evening!  I volunteered to be the DD (of course), since these two have long awaited a beer drinking reunion (and I don't like beer).  Ultimately, it was a little bit of a letdown.  The "commemorative beer cups"  were small, plastic, and paled in comparison to other cups we've gotten at brewfests before.  The lines were long and there were no food vendors, so the restaurants along the streets were selling hamburgers and hot dogs over the fence.  It seems super silly unsafe to me to have a beer festival without food, but it is Bremerton I guess!  The highlights were definitely getting more information on local breweries (including some from Poulsbo!), and catching a glimpse of Colin's future ship, the USS Stennis, after taking a wrong turn and ending up at the base! :)
The first beer -
The last beer.
After only being there a short time, 10 vendors had run out of beer, and the lines were getting longer and longer, so we decided to head back to a local bar in Poulsbo to get food and end the night.  After our stint at Tisley's Europub, these boys got back to what they do best - eating tots, drinking beer, and playing video games!  What a successful weekend long reunion!
Obviously, after the previous days excitement and hard work, we took Sunday morning nice and slow.  Once we had gotten George on his way back to Portland, Colin tried his hand at cutting the tiles for the fireplace with our new tile saw.  I think it came out perfectly, and I can't wait to lay them today!

We had initially chosen these pretty expensive accent pieces (almost $3 a piece!) for this area, but after a great suggestion from a friend, we looked into buying a sheet of smaller tiles used for back splashes and bathrooms, and cutting it up to make our own.  It worked out great and saved us a bundle!  Not to mention we love these accent pieces better than the ones we had originally chosen, and because they were netted together, we only had to use scissors to get those cuts perfect :)

Our floors should be getting here today (yay!!!!!!) and thus begins a long week of getting tile and laminate done.  My goal is to be done with all of this and on to painting doors and moulding by the time Colin's mom comes to visit the first weekend in August!  Wish us luck!
It doesn't matter to Lao Tzu if it's covered in cling wrap, a couch is still for napping!

Friday, July 22, 2011

Our Misadventures in Subfloor Preparation

This has been one long, hard, work filled week!  On Tuesday my mom came up to visit (yay!), and we got to work tearing up carpet and preparing the subfloors for laminate.  This was truly a bigger task than we anticipated.  Since we sort of feel like this part isn't really ever talked about when you research how to install laminate floors, consider this your how to guide complete with helpful tips!

Tip 1: Invest in a three pack mini crowbar set.  We got ours at Home Depot for around $10, and we haven't used anything nearly as much. 

To start, either look for the seam, or cut your carpet with a carpet knife.

Tip 2: Measure the door to the room, and then cut your pieces of carpet about 5 inches shorter.  This will make carrying out the giant rolls so much easier than if you just split the room down the center. 

After removing all of the carpet, pull up the carpet padding.  If the padding was wet for any reason, let the floor (and residual pad) dry, and then scrape it with a metal putty knife.

Tip 3: Save some of the carpet padding to wrap the tack board into.  It makes clearing those spiky little things out of the room much easier.

Next, pry up all of the tack board.  The crowbar set I talked about earlier is great for this!

Once all of the tack board is gone, get to work on the staples.  It may seem tedious, but if you want to do it right, it's worth the time.  We used a hammer and the smallest crowbar (although the others work too, just not as well) to pry the staples up.  Then, use a pair of snub nose pliers (Podelnyk technical term) to pull the loosened staples out.  It takes forever, but in the end knowing that your sub floor is in the best possible shape will be satisfaction enough!

Tip 4: As you're removing staples, use your hammer to make sure all of the nails are flush with the floor.  This will save you from having to scan the entire floor later for loose nails.  

Finally, sweep the room extremely well.  It's amazing disgusting how much dust accumulates under carpet.  Also make sure you get all of those sharp staples swept up!

Once the floor is back in shape, use a big level to check for high and low spots.  Sand where it's more than 3/16" higher, and fill in with leveling compound where it's more than 3/16" lower and then you're ready to get started on floors!

Tip 5:  Watch lots of youtube videos.  I know it sounds silly, but we've learned so much from them.  Lowe's also has great DIY videos that have helped us tons!

Here's how ours went:
Colin using a hammer and mini crowbar to pull up tack board.
Carpet free stairs! (definitely the hardest part)
Front bedroom after scraping off broken down carpet padding.
Bonus Tip: Make sure to secure big furniture that can't be moved out.  We wrapped our couch pieces in industrial cling wrap to keep it safe from dust.
Finished living room!
Back bedroom before being scraped, and an example of using carpet padding to carry out tack board.


After finishing up the floors, we started breaking up tile!  It was pretty much the most fun ever, and I can't wait to start on the entryway tomorrow!  Hopefully we'll have our new tile in by the end of the weekend!

*Disclaimer: Of course if you find something crazy like mold or broken boards, you'll need to take extra steps.  Luckily, we didn't encounter anything like that so I can't include it in our "how to."

Tuesday, July 19, 2011

Oh how I've missed you, Seattle!

From the ferry
Yesterday was an excellent day as far as getting out of the house goes!  Waaaaayyy back in May when we were talking about how we were going to spend our second wedding anniversary, we decided it would be fun to go back to the place where we had our first official date, since we would be so close to Seattle.  Of course, as you all know, we were not close to Seattle on our anniversary, and had to play the whole thing by ear.  Because he knows how much of a sap I am for stuff like this, and it seems we'll have a pretty constant stream of people coming and going around here for the next two months, Colin decided that yesterday would be the perfect day to fulfill our initial anniversary plans!
Excited to have made it!
So we got dressed like normal people (not in paint clothes), and headed towards the ferry on Bainbridge Island!  I have to say, I don't think I really realized how close Seattle is until we drove out there.  Having only taken the Bremerton ferry before (which takes about an hour usually when all is said and done), being able to see Seattle from the ferry before ever leaving was pretty amazing, and it only took around a half an hour! 
Since there was no real reason to drive, we decided to walk on and enjoy the sights.  The whole ferry seemed to be filled with happy people and happy dogs yesterday.  It was pretty great.  I spent most of the time just being excited to be back :)
The Pike Pub and Brewery
Once we were on land again, we walked over to Pike and did the mandatory walk around before ending up at the brewery.  It's funny to think that when we were first there Colin had only been 19 for about a month or so, and neither one of us could drink.  This time, we thoroughly took advantage of their amazing happy hour!  We ordered a huge chunk of smoked salmon with cream cheese and rye bread, steamed clams, garlic shrimp, and crab and artichoke dip.  Did I mention that they were all around $6 each?  It was a ridiculously good deal and not a thing was short of delicious.  Needless to say, we pretty much devoured it all - Colin taking the cake by single-handedly eating roughly 40 beer boiled clams stomach ache free. 
The carnage
After we packed up what we could of the leftovers, we headed back towards the ferry and back home.  It was an exciting, spontaneous adventure that I'm glad we didn't just say we were going to do and forget about.  As far as the difference between now and 2006?  2006:  I ordered the cheapest, seemingly easiest thing to eat as to make sure not to make a fool of myself, and took at least two bathroom breaks to make sure I still looked ok.  2011:  We both ordered a million things off of the appetizer list with no embarrassment, and just comfortably enjoyed a day out together!
Successful day in the city!

Sunday, July 17, 2011

Sad Headache Sunday and Continued Improvements

 Today was sort of a sad headache kind of Sunday.  After getting some things done around the house, I got a killer headache and spent the rest of the night in my hipster shades hiding from light and sound :( 

But before the devastating pounding started, we got some really great things accomplished and the living room area is nearly done!  Yay!  Not only did we replace every outlet and light switch in the living room and entry way, but we also installed the new chandelier in the entry way, unpacked our bathroom stuff (finally) and organized the master bath, and installed a new doorbell!  It was definitely a slower day around here, but as the smaller projects that we're able to do get fewer and fewer, it's nice to be able to just sit back, watch some Adventure Time, and relax with our cats for a while. 

Here's the photographic evidence of all of our hard work:
The old entryway light fixture that seamlessly combined painted gold and silver plastic, wood paneling, and spray painted black aluminum.  It was definitely one of a kind.  It also hung really low into the entry way for some strange reason.
Our new beautiful light fixture that was actually (and surprisingly) much easier to install (lets face it, Colin really did all the work on this one).  It turns out we learned from the disaster yesterday in the dining room!
Our old yellowed, mysteriously sticky, cracked doorbell.
Our new sleek white doorbell that plays a fancy little tune!
Of course he spent most of the day doing extremely manly things like drinking protein shakes, lifting double his body weight on the bowflex, and hunting giant elk.
Extreme kitten relaxation.
We're more actively researching tiling the entry way and in front of the fireplace (aka watching a million videos on youtube), and hopefully will start on ripping up floors this week.  It's sort of a daunting task, but just knowing that we're almost done with the big stuff for a while is motivation enough!

Saturday, July 16, 2011

New Light Fixtures

After lots of hard work, we decided to take today a little slower (ha).  Once we finished a nice long breakfast of waffles, eggs, and bacon, we got to work moving pretty much every box and medium sized piece of furniture into the basement in preparation for pulling up all of the carpet.  We then moved on to a gigantic home depot trip for things like light fixtures, smoke alarms, and other items we needed to get the house back up to code (mostly outlet wiring). 

Since we were committed to lots of train track building with Rogan for most of the night, we only installed one of our new chandeliers.  Let me tell you, it was not as easy as we thought it was going to be!  Those suckers are heavy and our ceilings are ridiculously vaulted, but this light just happened to be in an area too low for our ladder.  The only way we could conquer it was to put the whole light together, have Colin stand on a stool and mount the hardware/wire the new light, while I held the giant thing on my shoulders until he was done.  Here's the final product:
Old
New
It definitely makes a dramatic difference in the room!  Not to mention it's nice to have a light in the living area that wont randomly go out every now and then!  Tomorrow, we're tackling the one in the entry way.  I'm sure with the heavier light and the higher ceiling it should be a piece of cake!

Friday, July 15, 2011

Fireplace Transformation

We finally finished a project that I can share with you!  Over the last few days, in between painting every wall in the house, we've been bringing our fireplace back to life.  Here's what it looked like when we started:

The first thing we did was remove the gold insert and clean out years worth of ash and dirt.

After the clean out
All of the ash that I shoveled out.  I'm pretty sure it had never been cleaned before.
After lots and lots of scrubbing, we finally realized that it was just too stained to survive no matter what cleaning products we used.  I was initially a little sad because I really liked the dark brick color, but nonetheless it had to be painted. 

The first step in painting a fireplace is priming the brick.  You can get masonry primer for this, but the nice people at home depot said that regular primer would work fine if we already had it (which of course we did), we just may have to do a couple coats to hide the stains.  This was after the first coat, but it only ended up taking two.

Next, we painted the wall a nice warm brown tone, only slightly darker than the walls in the hallway, living room, and entry way, and tested out a cream color for the final coat on the fireplace.
After all of the hard work and back and forth feelings about painting the brick, I am thrilled with the end result!  It makes the whole living room look more modern and the fireplace is a beautiful centerpiece for the room. Now all that's left is to replace that gross tile! (coming soon!)

What do you think of the transformation?  Are you of the mindset that brick should never be painted, or is it ok if there's no other way to save the integrity of the fireplace?

Before

After